onboard supports integration with Azure Active Directory (AD) to use single sign-on (SSO). This requires the following steps:
- Add and configure onboard as an app in Azure Active Directory AD
- Assign users in Azure AD
- Invite users into onboard and assign access rights
For more information, see the official documentation: https://docs.microsoft.com/en-en/azure/active-directory/manage-apps/configure-saml-single-sign-on
Add onboard as an app in Azure Active Directory AD
Add onboard as a new SAML app in Azure AD. To do this, we provide you with the service provider data.
- Create a new app in Azure AD by first selecting “Enterprise apps” and then “Create your own app”. There you can create an onboard app using “Integrate any other app not found in the catalog” (see https://docs.microsoft.com/en-en/azure/active-directory/manage-apps/add-application-portal).
App name: onboard
App icon: https://cdn3.onboard.org/images/logo/square.jpg - Select the app and click “single sign-on” in the left sidebar and then “SAML”
- Now you can enter the SAML configuration of onboard at “Basic SAML configuration” (see https://docs.microsoft.com/en-en/azure/active-directory/manage-apps/configure-saml-single-sign-on). You will receive the following configurations from us:
– identifier (entity ID)
– login URL
– response URL (assertion consumer service URL)
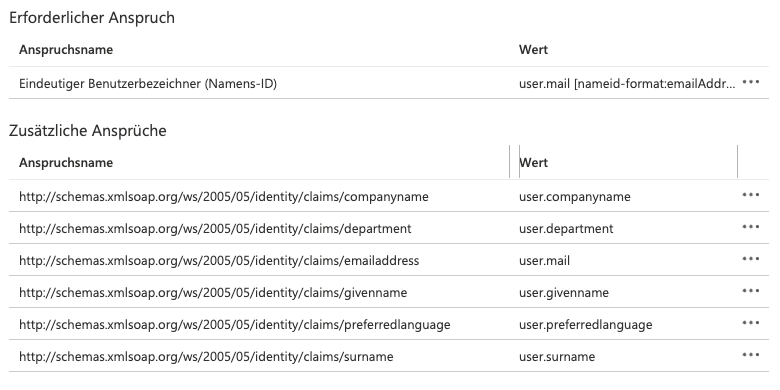
– logout URL - At point 2 “user attributes and claims” the fields have to be assigned. These values are taken from onboard and entered in the user profile:
– unique user identifier: user.mail
– givenname: user.givenname
– surname: user.surname
– preferredlanguage: user.preferredlanguage (optional)
– gender: user.gender (optional)
– companyname: user.companyname (optional)
– department: user.department (optional) - After successful setup, download the “certificate (Base64)” and copy the values of the “login URL,” “Azure AD Identifier” and “logout URL” fields. We need this data to configure onboard.
Assign users in Azure AD
You can determine directly in Azure AD which users are allowed to use onboard. We recommend creating your own group.
Invite users to onboard and assign access rights
A user who logs in through Azure AD has no permissions in onboard as a default setting. You can invite a user and assign a role to them in onboard.
Log in to onboard via Azure AD
Users log in via the onboard welcome page or directly via the Azure AD application page. Once a user is logged in, they are redirected directly to onboard.
Frequently asked questions
I receive an error message “The signed in user is not assigned to a role for the application.”
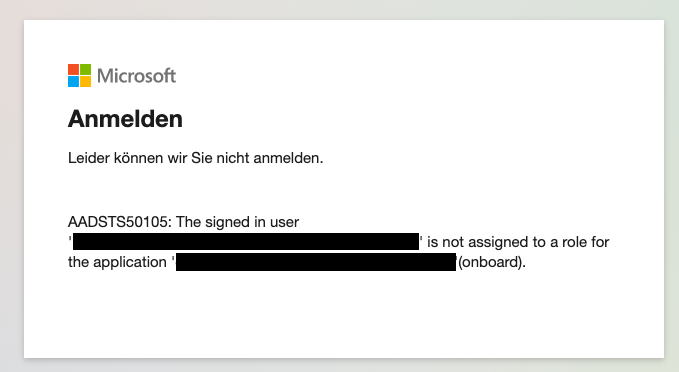
In this case, the AD user does not have permission to open the application. You must allow the user to run the application (see https://docs.microsoft.com/en-en/troubleshoot/azure/active-directory/error-code-aadsts50105-user-not-assigned-role).
After successful login, the user is redirected back to the welcome page.
Check if the user has been deactivated from onboard in the user management. If this is the case, he cannot log on to onboard (he is blocked, so to speak). You can activate the user again.