The messenger in onboard serves as a communication hub for the recruiting process.
Access the messenger
Access via candidate file
- Click on “Candidates” in the side menu and then a desired status
- Click on the desired candidate file
- You are now in the overview of the candidate file
- In the third tab in the ribbon you will find the messenger
- You will now see the chat interface of the messenger
Access via main menu item “messenger”
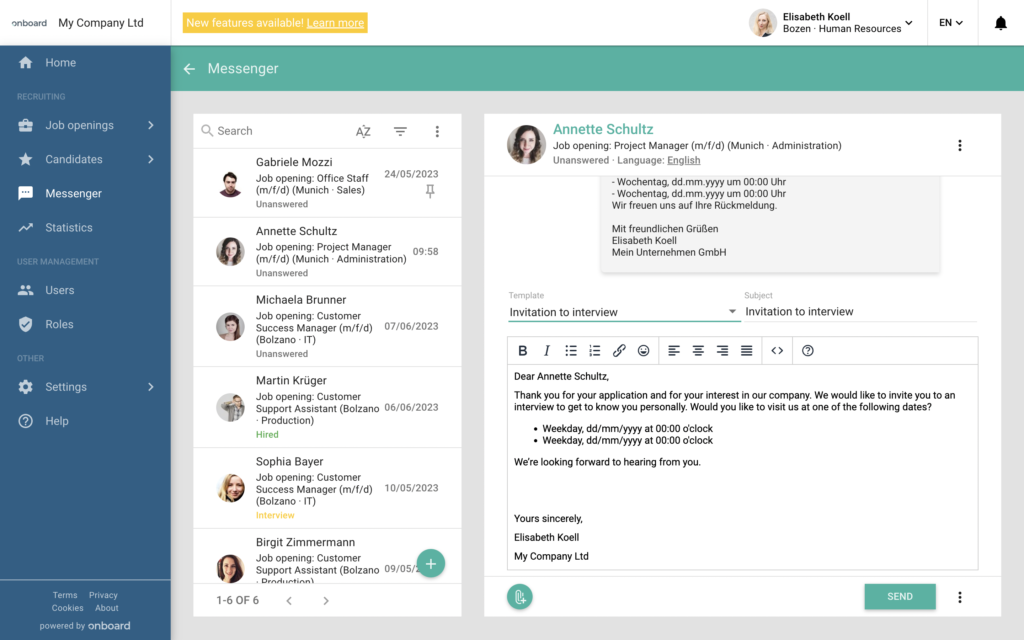
- Click on the menu item “messenger” in the side menu on the left under “Recruiting”
- You are now in the general messenger
- On the left you can see a list of all applicants with whom you have already been in contact
- You can search for applicants, filter them or start new conversations via the “+” button:
In the pop-up above the “+” button you can search for individual applicants or select several, with “Next” you get to the chat interface - When you click on an applicant, the chat interface opens on the right side of the page
Using the messenger
Sending messages
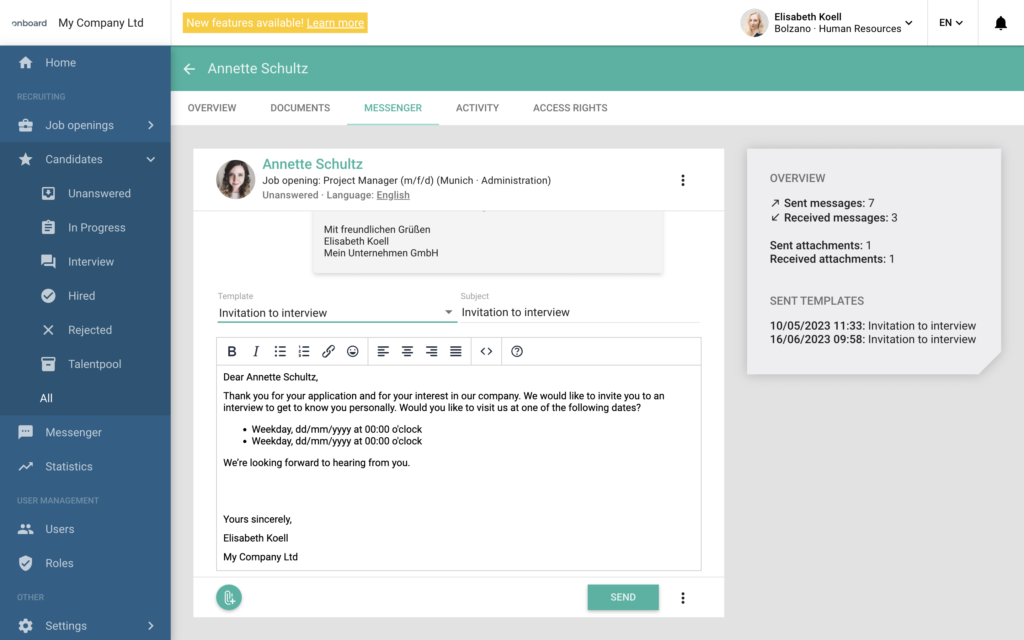
- Open the chat interface either via the menu item or an applicant file
- To compose a message click in the message field
- There is a predefined “Blank template”, which is used to write messages quickly, in this template the form of address and greeting are already stored (editing in the settings)
- On the right above the message box you will find the subject, which you can customize
- To the left of it, a saved message template can be selected
- Via the “(?)” icon you can use placeholders for immediate shipping
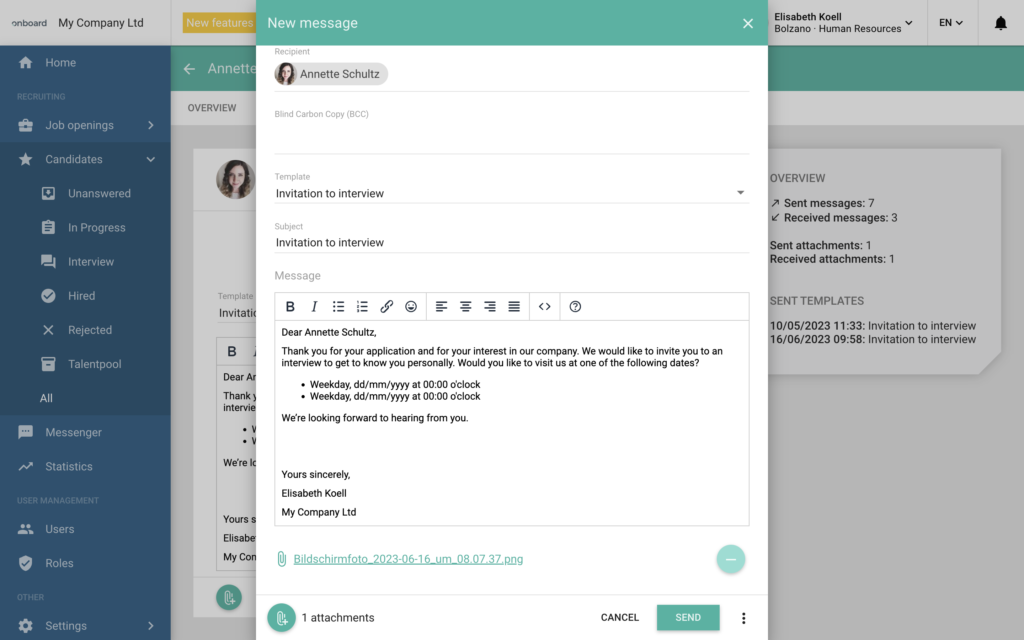
- You can attach files via the paper clip icon:
The uploaded files can be managed by clicking on them - No headers and footers appear in the chat interface to keep the writing process clearer; you can see the full message via the three action points –> Preview, here you can return to editing or send the message immediately
- Via the three actions points you can also:
- open an extended view where there is more space to write and add a blind copy address
- use the translator (if multiple languages are active and the applicant does not speak the system language)
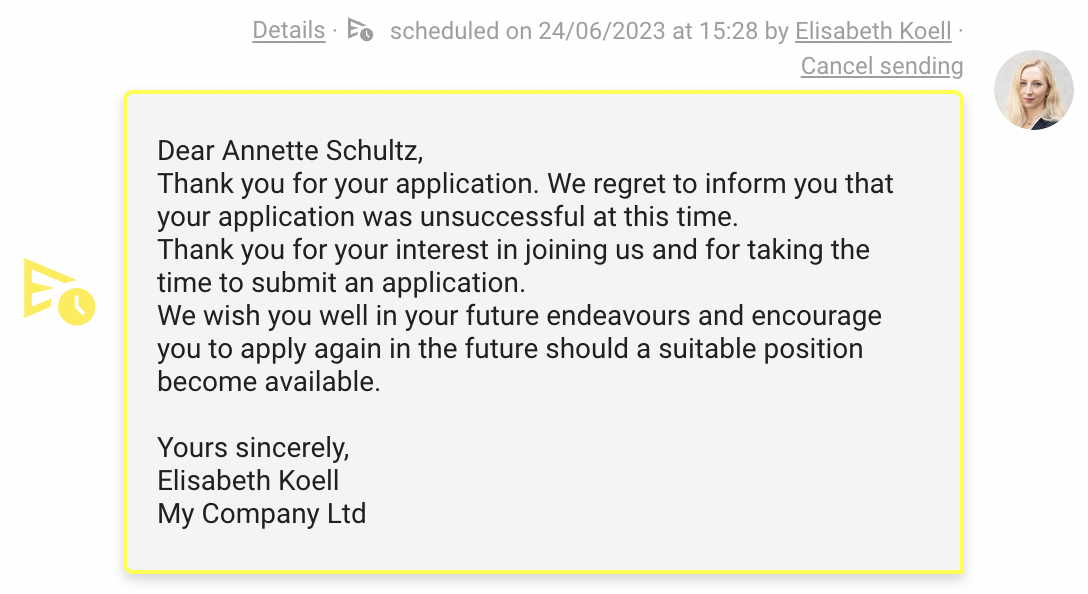
- select a time before the message is sent later (these messages are specially marked)
- Sending via “Send” must always be confirmed manually
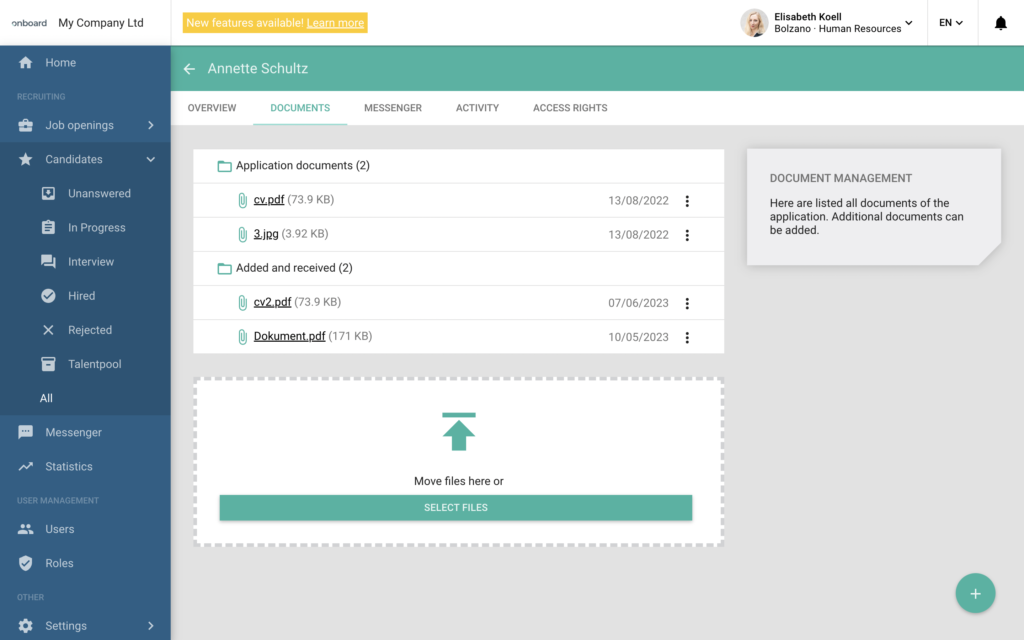
Documents
Documents that you receive via Messenger are automatically stored under “Documents” in the applicant file. They can also be managed and deleted here.
Menu item “messenger”
The dedicated menu item “Messenger” gives you a quick overview and access to conversations with various applicants.
You can think of this view as a mailbox, with a number of management options.
Applicant list
In the menu item you will find a list of conversations that have already been started.
Applicants who have not started an active conversation but have only received the automatic response for their application via the application form are excluded from the list.
If you want to write to these applicants, you can start the conversation via the applicant file or via the “+” button in the “Messenger” menu item.
To continue an active conversation, simply click on the applicant in the applicant list and the chat will open on the right.
Filters
You can filter the chats according to the following categories:
Status of the message
Read
You can filter to see all messages, only unread messages or only read messages.
Unanswered
You can filter to see all messages, only answered messages or only unanswered messages. Only unanswered messages can also be messages that have already been read but not answered.
Archived
You can use this filter to show archived messages that have been hidden.
Scheduled
You can filter to see all, only scheduled or only unscheduled messages.
Started
You can filter to see all, started or not started messages. By default, the filter “started” is set here to show only active conversations and to hide applicants who have only received the confirmation of receipt.
Candidate status
Filter by the status of your applicants, which you have available in your side menu under “Applications”.
Locations
Filter by the locations of your company.
Departments
Filter by the departments of your company.
Job opening
Filter by your job opening.
Sorting
You can change the sorting of your chats using the “AZ” symbol:
- New chats first (default setting)
- Unread chats first
Message status
Read and unread
A newly received message has the status “unread” by default and is therefore marked red.
As soon as you click on this message, the red marking disappears and the message is “read”.
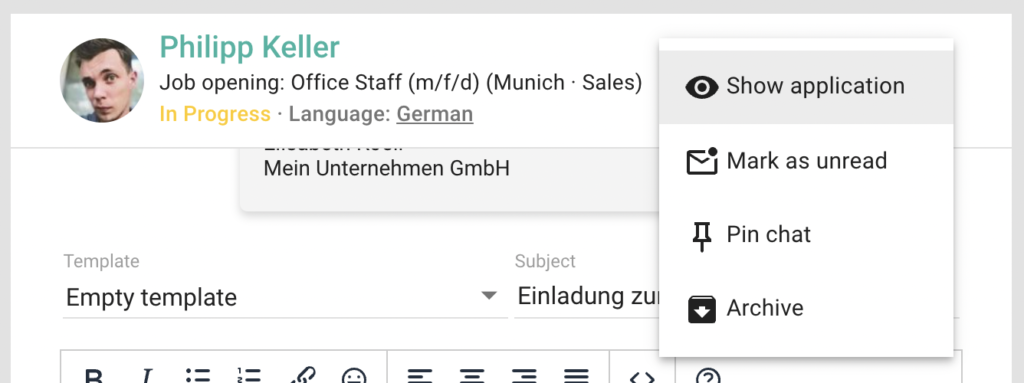
You can set the status back to “unread” by clicking on the three action points next to the applicant name and selecting “Mark as unread”.
Pin chat
This status is global and thus fixes the conversation with a specific applicant at the top of the applicant list. The chat can be deleted afterwards.
Archive
If you want to close the conversation with an applicant, you can archive it. This process removes the chat from the applicant list in the “Messenger” menu item and is therefore global for all users.
The chat is still in the applicant file and will not be deleted.
Messaging to multiple recipients
Via the menu item “Candidates”
Click on a desired status under “Candidates” and activate the multiple selection via the three action items.
Now select all the desired applicants and choose the option “Send message” under “Select option”.
Now the chat interface opens, they don’t see names here but only placeholders because they have selected multiple people. Don’t forget to check the translations or add more text to the message. Additional candidates can be added via the recipient row, just type in the name.
Via the three action points –> “Preview” you can view the messages with the correct salutations and names before sending.
Via the main menu point “Messenger”
You can start new conversations using the “+” button in the Messenger menu item.
Search for the desired candidates here or select them from the list. You can also filter them.
Click on “Continue” to get to the chat interface.
Notifications and accesses
Notifications
When you receive messages from candidates, you will see them directly in onboard. To make you aware of new messages, you will receive an email notification from onboard once or twice a day, depending on your settings. In the system, you will receive the notification via the bell at the top right. In addition, we also show you new messages in the menu item messenger, and you can already see how many new messages are waiting for you directly when you enter onboard.
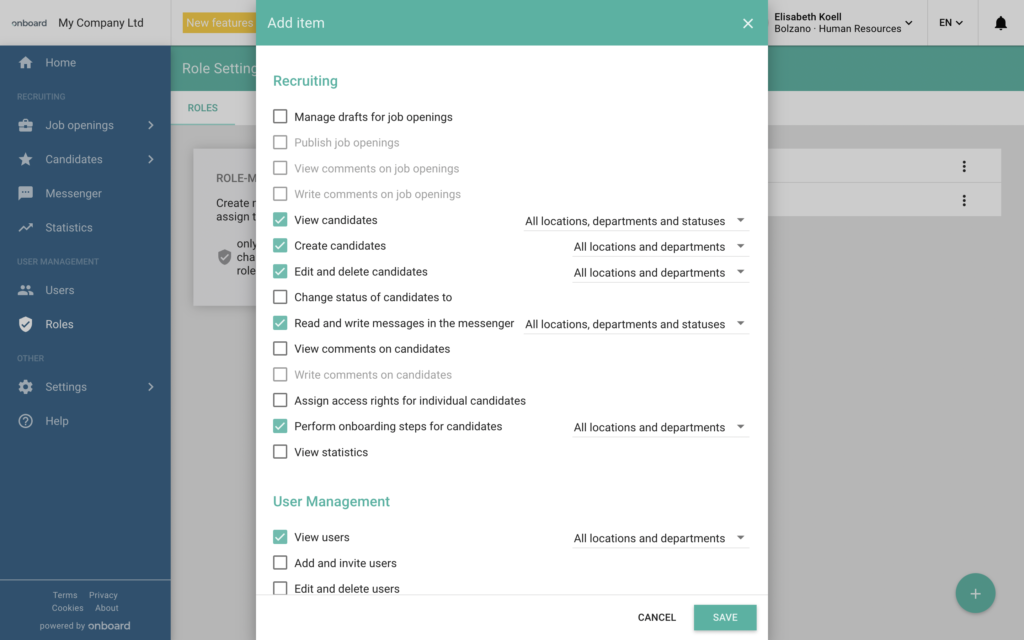
Roles and access
You can clearly define in the settings who can have access to the messenger and who not.
Frequently asked questions
How often are messages received and sent?
Sending messages is instantaneous, for receiving our servers are synchronized every few minutes.
How does sending via Messenger work?
Your company will receive an individual e-mail address for sending and receiving the messages. For the applicants, your chosen sender name is visible when receiving the messages.
How can I quickly mark several messages as read?
Filter by “Message status” –> “Unread” (category “Read”) and –> “Answered” (category “Unanswered”) at the same time. You will now only see messages that you have not yet read but that other users have already replied to.
Now activate the multiple selection via the three action points and select all messages.
Under “Select action” you can mark the messages as “read”.
Can I integrate a video into my e-mail?
In most cases, embedding video files for direct playback in the email is not supported by the email programmes and is blocked.
As an alternative, however, an image (e.g. a screenshot of the video) could be inserted in the e-mail and linked to the video.